How RSI Made Me a Better Developer
I’ve wanted to write a blog post about my journey with repetitive strain injury (RSI) for quite a while now. I’d been putting it off because the amount of content that I wanted to include seemed to be increasing exponentially with time.
Anyhow, I’ve decided to go for it and I’m hopeful that I’ve selected the most important parts of my recovery, especially for a fellow programmer. My RSI affects my fingers, hands, wrists and forearms so it has had a pretty significant impact on my day-to-day life, which I normally spend programming in python or writing in LaTeX.
I’ve decided to start the post with my story and then afterwards go into detail about what I consider the most import aspects of my recovery (or management). This has definitely been the hardest injury that I have ever had to deal with, so I hope the info in this post can make the process easier for anyone in a similar situation.
For those in a rush, here’s a quick summary of the tips I would give to a fellow RSI sufferer:
- Learn how to sit correctly at a desk,
- Get an ergonomic keyboard and mouse,
- Learn to touch type,
- So that you can learn the vim keybindings and get the most out of them,
- Stretch your forearms, fingers, etc multiple times throughout the day,
- Try to strengthen your fingers and forearms e.g. gym, climbing,
- Equip yourself with the best text editor Spacemacs (vim meets emacs).
Table of Contents
My Story
Around 6 months ago, I was sat at my desk when I noticed a slight pain in my hands, I wasn’t quite sure what the pain was or how I had caused it. Nevertheless, I had things to do and deadlines to meet, so I continued typing… I first assumed that the cause of this mysterious pain was the climbing trip I had been on the previous weekend, I was climbing some pretty gnarly routes so I assumed this was plausible 😆 As the week progressed, so did the pain, first to my fingers, then wrists and then forearms, as well as generally getting a lot more intense. At this point I started to consider that the pain was due to my trackpad and/or keyboard (I was using an Apple magic keyboard and an Apple magic trackpad at the time). Don’t use them, unless you actively want to develop RSI! Eventually the pain got so bad that I had to stop working on my computer and I spent my days reading instead (luckily I’m a PhD student so reading is actually a great use of my time).
After a few days of not typing the pain would reside, “great, I’m better, lets get programming”. Unfortunately, this was not the case and within the hour the pain was back with vengeance. I cycled through this process several times, gradually increasing the resting period. I think there was a little part of me holding on to the idea that it might just magically disappear. After a few weeks of repeating this process and reading endless blogs/forums/articles, I finally accepted that something was definitely wrong. All that I could think was “I’m never going to be able to program again”, which made me pretty sad.
Following this, I booked an appointment to see my local GP 🏥 and was there by the end of the week. After a quick examination and an X-ray, it was confirmed, the pain was RSI and most likely due to my work station. I then started seeing a physio who provided me with a list of stretches and exercises. These have been crucial to managing my RSI so please don’t skimp on your exercises!
After a couple of tough weeks I was left thinking that I would have no more late night hacking, working over the weekends and definitely no career involving programming or typing! RSI has been a slow and painful journey significantly impacting both my mental and physical well-being. I’m happy to say though, I am through the other side and feel better than ever.
I’ve decided to structure the rest of the post by first covering proper desk ergonomics and then introducing my solutions. I start with keyboards, then tackle mechanical switches, ergonomic mice, OSX applications, stretching and strenghening and finally text editors and IDEs.
Desk Ergonomics
Setting up your work station correctly is super important for managing RSI.
There are loads of resources out there with useful information on desk ergonomics so I’m not going to go into too much detail here.
However, the image below from computer-posture.co.uk contains a lot of useful information.
I started my adjustments by correcting my seat height so that my arms had a nice 90$^{\circ}$ bend in them. This left my feet hovering in the air so I had to get myself a footrest in order to achieve a nice 90$^{\circ}$ leg bend. I then lifted my monitor to its maximum height and put a few books under my laptop stand to get it to a decent height. Making these adjustments is fairly straight forward but I’d never given it much thought before and had been sat with terrible posture.
Keyboards (down the rabbit hole we go) 💸
I started my keyboard journey by loaning a Microsoft Natural Ergonomic Keyboard 4000 from the health and safety services at my university.
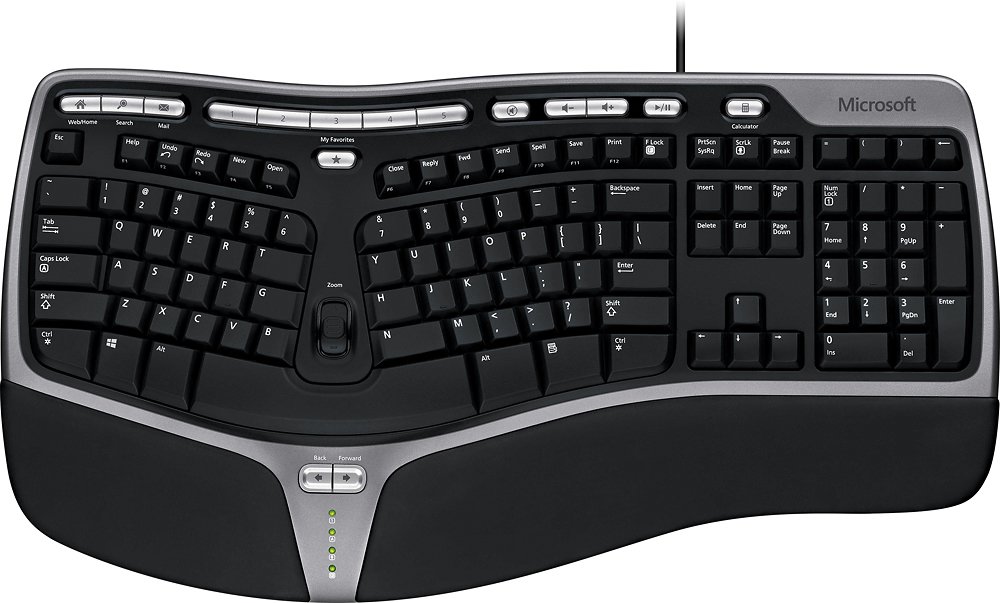
After a couple of weeks typing on the Microsoft Natural Ergonomic Keyboard 4000 and using the 3M Wired Ergonomic Mouse the pain in my hands and wrists had started to ease, however, the pain in my fingers and forearms persisted.
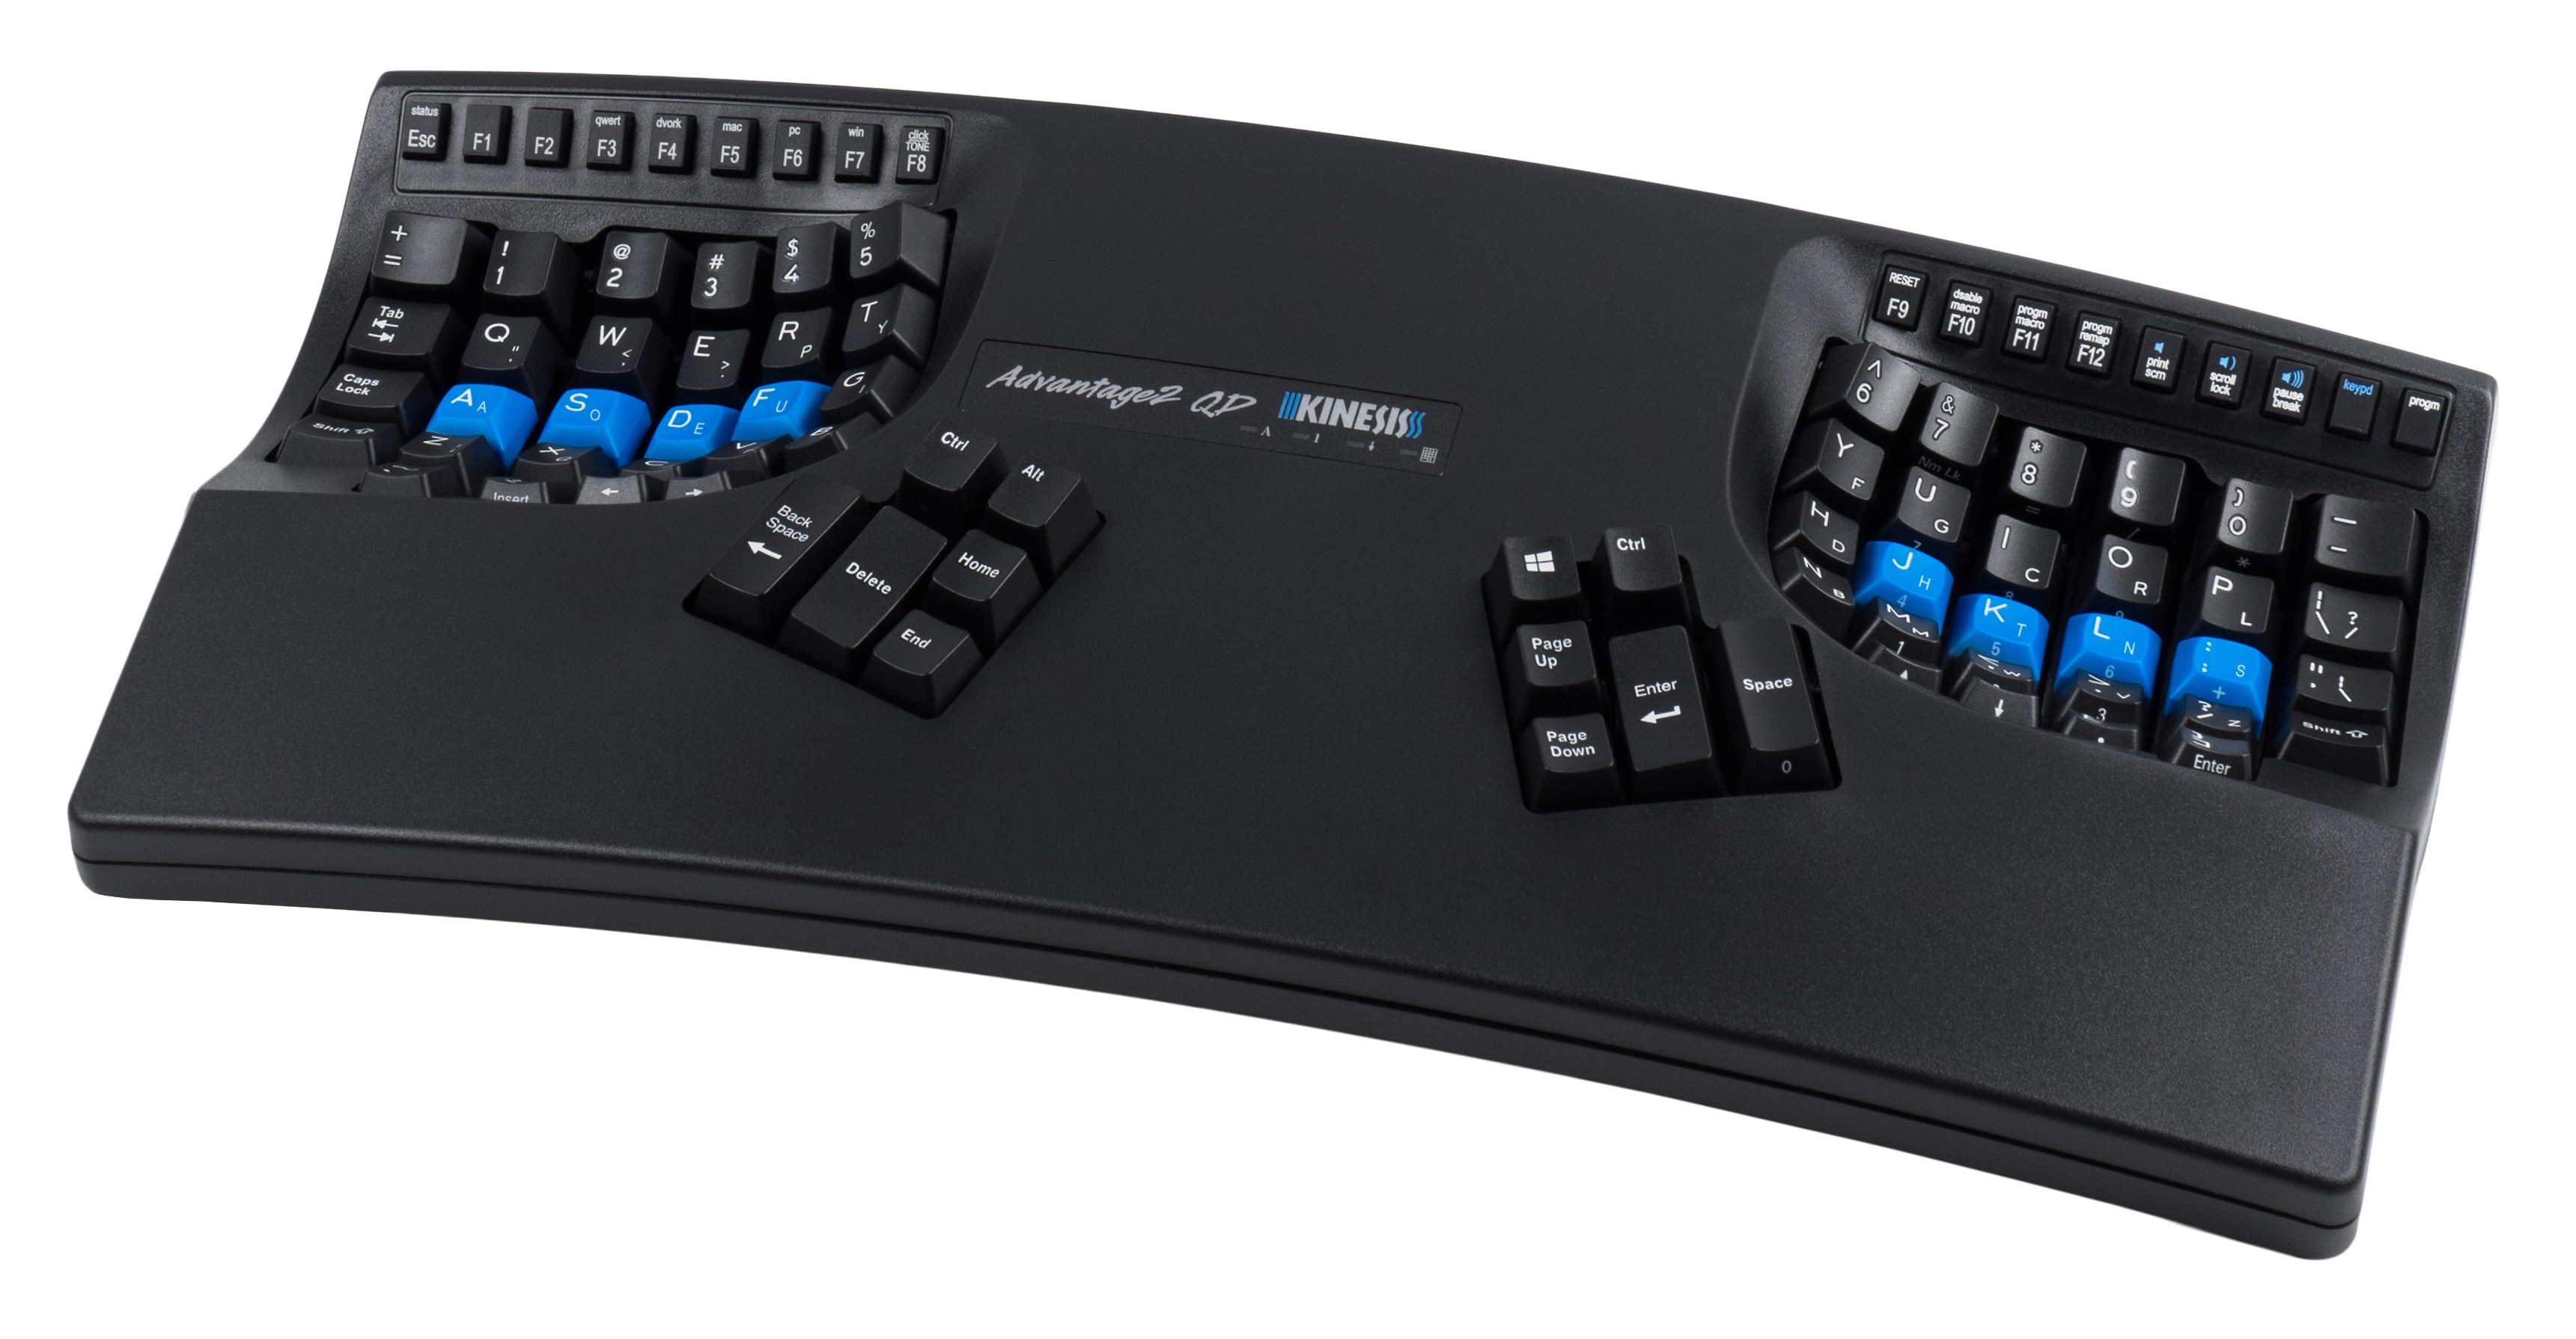
Kinesis Advantage 2
Weeks of reading blog posts and reddit (r/MechanicalKeyboards, r/ErgoMechKeyboards) inevitably led me to the Kinesis Advantage 2. This keyboard is a bit of a bank breaker but is probably one of, if not the best, ergonomoic keyboards on the market for touch typists (though anyone can buy it and learn to touch type like I did).
Touch Typing
Before getting the keyboard I had dabbled in touch typing, playing with online tutorials such as the typing club but I had never taken it seriously and fully committed. Through the combination of struggling to type and reading online it became apparent that learning to touch type would reduce the strain on my hands and fingers, with the added benefit of making me a more efficient programmer. Investing a few days in the typing club followed by religiously touch typing for a week was enough to get myself typing at a decent speed. At the start it did take me 30 minutes to type two sentance emails! Although it was a painfully slow process, it was definitely one of the best decisions I have made regarding productivity.
Here are some of the key features of the keyboard that make it so great from an ergonomics POV (shamelessly copied from their website).
- Concave keywells - keywells are scooped into a bowl shape to reduce hand and finger extension and relax muscles.
- Split - Separating the keywells positions the arms at shoulder-width to keep wrists straight and perpendicular to the home row to reduce abduction and ulnar deviation. Note: although the keywells are separated the keyboard is not a true split keyboard as it doesn’t consist of two parts.
- Ortholinear - the keys are arranged in vertical columns (rather than staggered) to better reflect the natural motion of your fingers.
- Tenting - The two keywells are “tented” at an optimal 20 degree angle moderately raising the thumb side of the hand. Tenting puts you in a more neutral, “handshake” posture and reduces the stresses caused by forearm pronation.
- The integrated palm supports reduce stressful bending of the wrists and provide a convenient place to rest your hands when you are not actively typing.
- The thumb clusters include frequently-used keys such as Enter, Space, Backspace, and Delete to redistribute the workload away from your relatively weaker and overused little fingers to stronger thumbs.
It definitely took a while to get used to the keyboard, I would say around two weeks of actively having to think where all of the keys are. Now that I am used to it though, I would definitely say that I have surpassed my typing speed on a standard qwerty keyboard. So not only has it significantly reduced the pain but it has also increased my productivity. One of the only downsides is that I suck at typing on regular keyboards, but I try to keep that to a minimum anyway.
For about 2 months I only had a single keyboard which I had to use for both work and personal use. This was fine for a short period but it was inevitable that I would eventually buy a second keyboard for home use. My main issues with the Kinesis Advantage were the lack of adjustable tenting and the fact that it’s not a true split keyboard. With this in mind I spent a long time researching alternative keyboards from which I was left with two main contenders; the ErgoDox EZ and the Dactyl Manuform.
Ergodox EZ
The ErgoDox EZ is a highly customisable, open-source keyboard with ergonomics at the forefront of it’s design. Here’s a picture of my beautiful ErgoDox EZ.
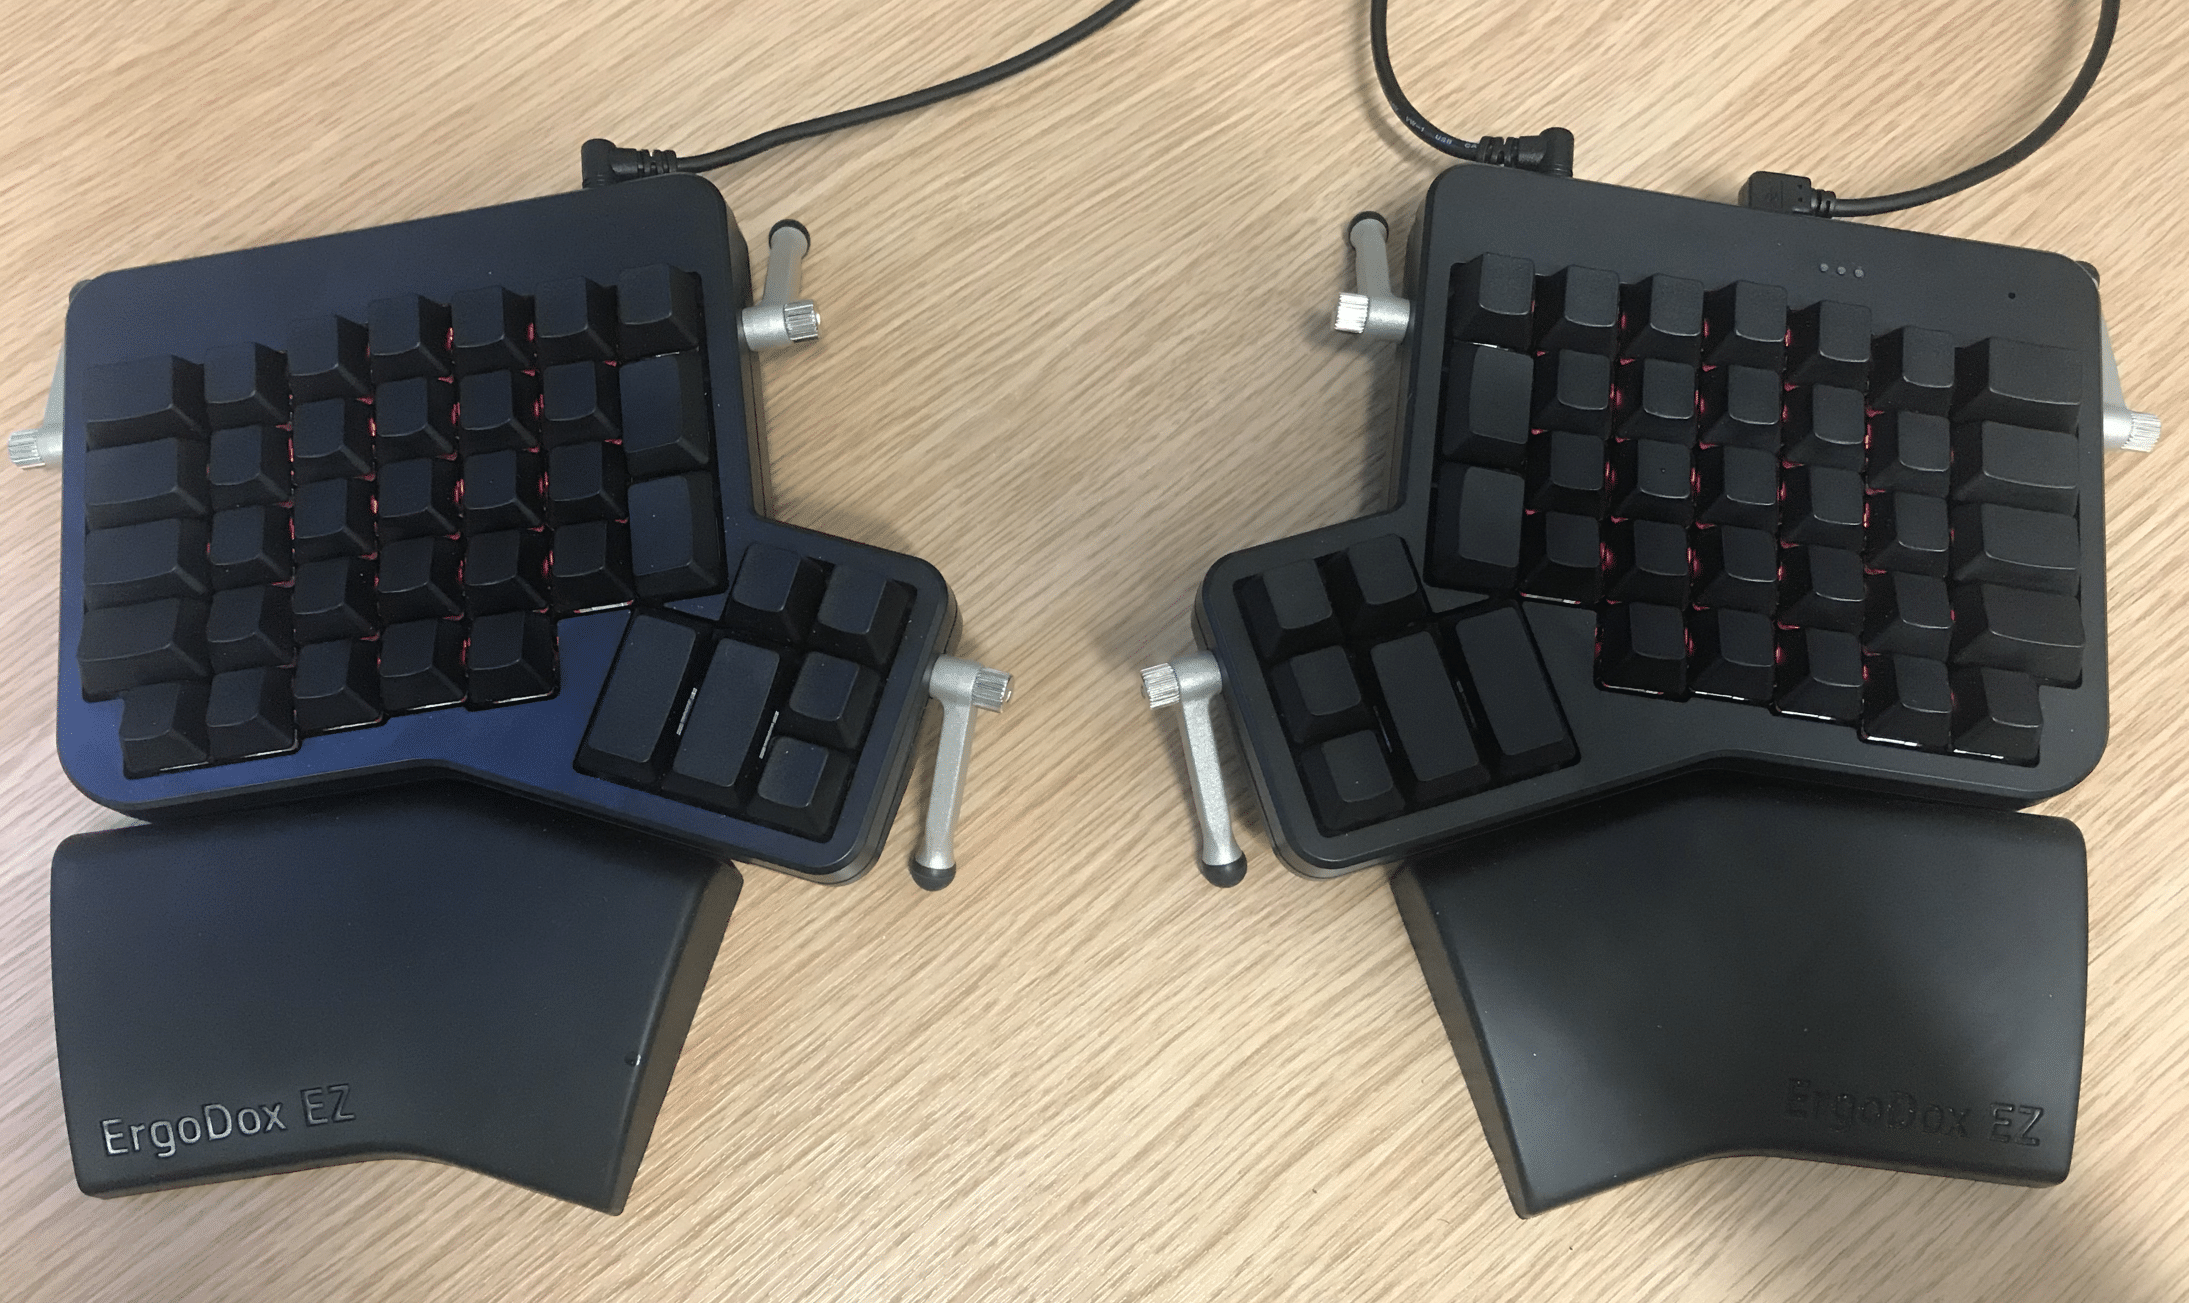
It has a truly split layout which allows people with broad shoulders to place the two halves shoulder-width apart, reducing strain in the shoulders and wrists. Similar to the Kinesis Advantage it’s also ortholinear and comes with the option to purchase a tilt/tent kit, which I would highly recommend. The kit enables you to control the angle of the keyboard relative to your desk which can greatly reduce the starin in your wrists and forearms. The Kinesis Advantage is split and has tenting but it doesn’t allow you to adjust them to your personal needs. This is one of the main reasons I love the ErgoDox EZ.
When you purchase the ErgoDox EZ you can also select whichever switches you prefer. This is great when compared to the Kinesis Advantage which only gives you a couple of options. You can now also change the keyswitches at anytime without any soldering. This is one of the only keboards with this capability to my knowledge. You can also change specific switches at any time so if there are certain keys that you press harder/softer then you can experiment with different types of switches.
My favourite feature of the ErgoDox EZ is the ability to configure different layers. I’ve included photos of the layers I’m currently using below. Keys can have different behaviours depending on wether they have been pressed or held. For example, in my main layer on the thumb cluster the space, enter, delete and backspace keys are used to activate other layers when held. You can also configure the keyboard so that double tapping a key is equivalent to holding it. For example, in my main layer the backspace can be held by double tapping. This is needed as holding it will activate layer 4.
The figure below shows my main qwerty layer.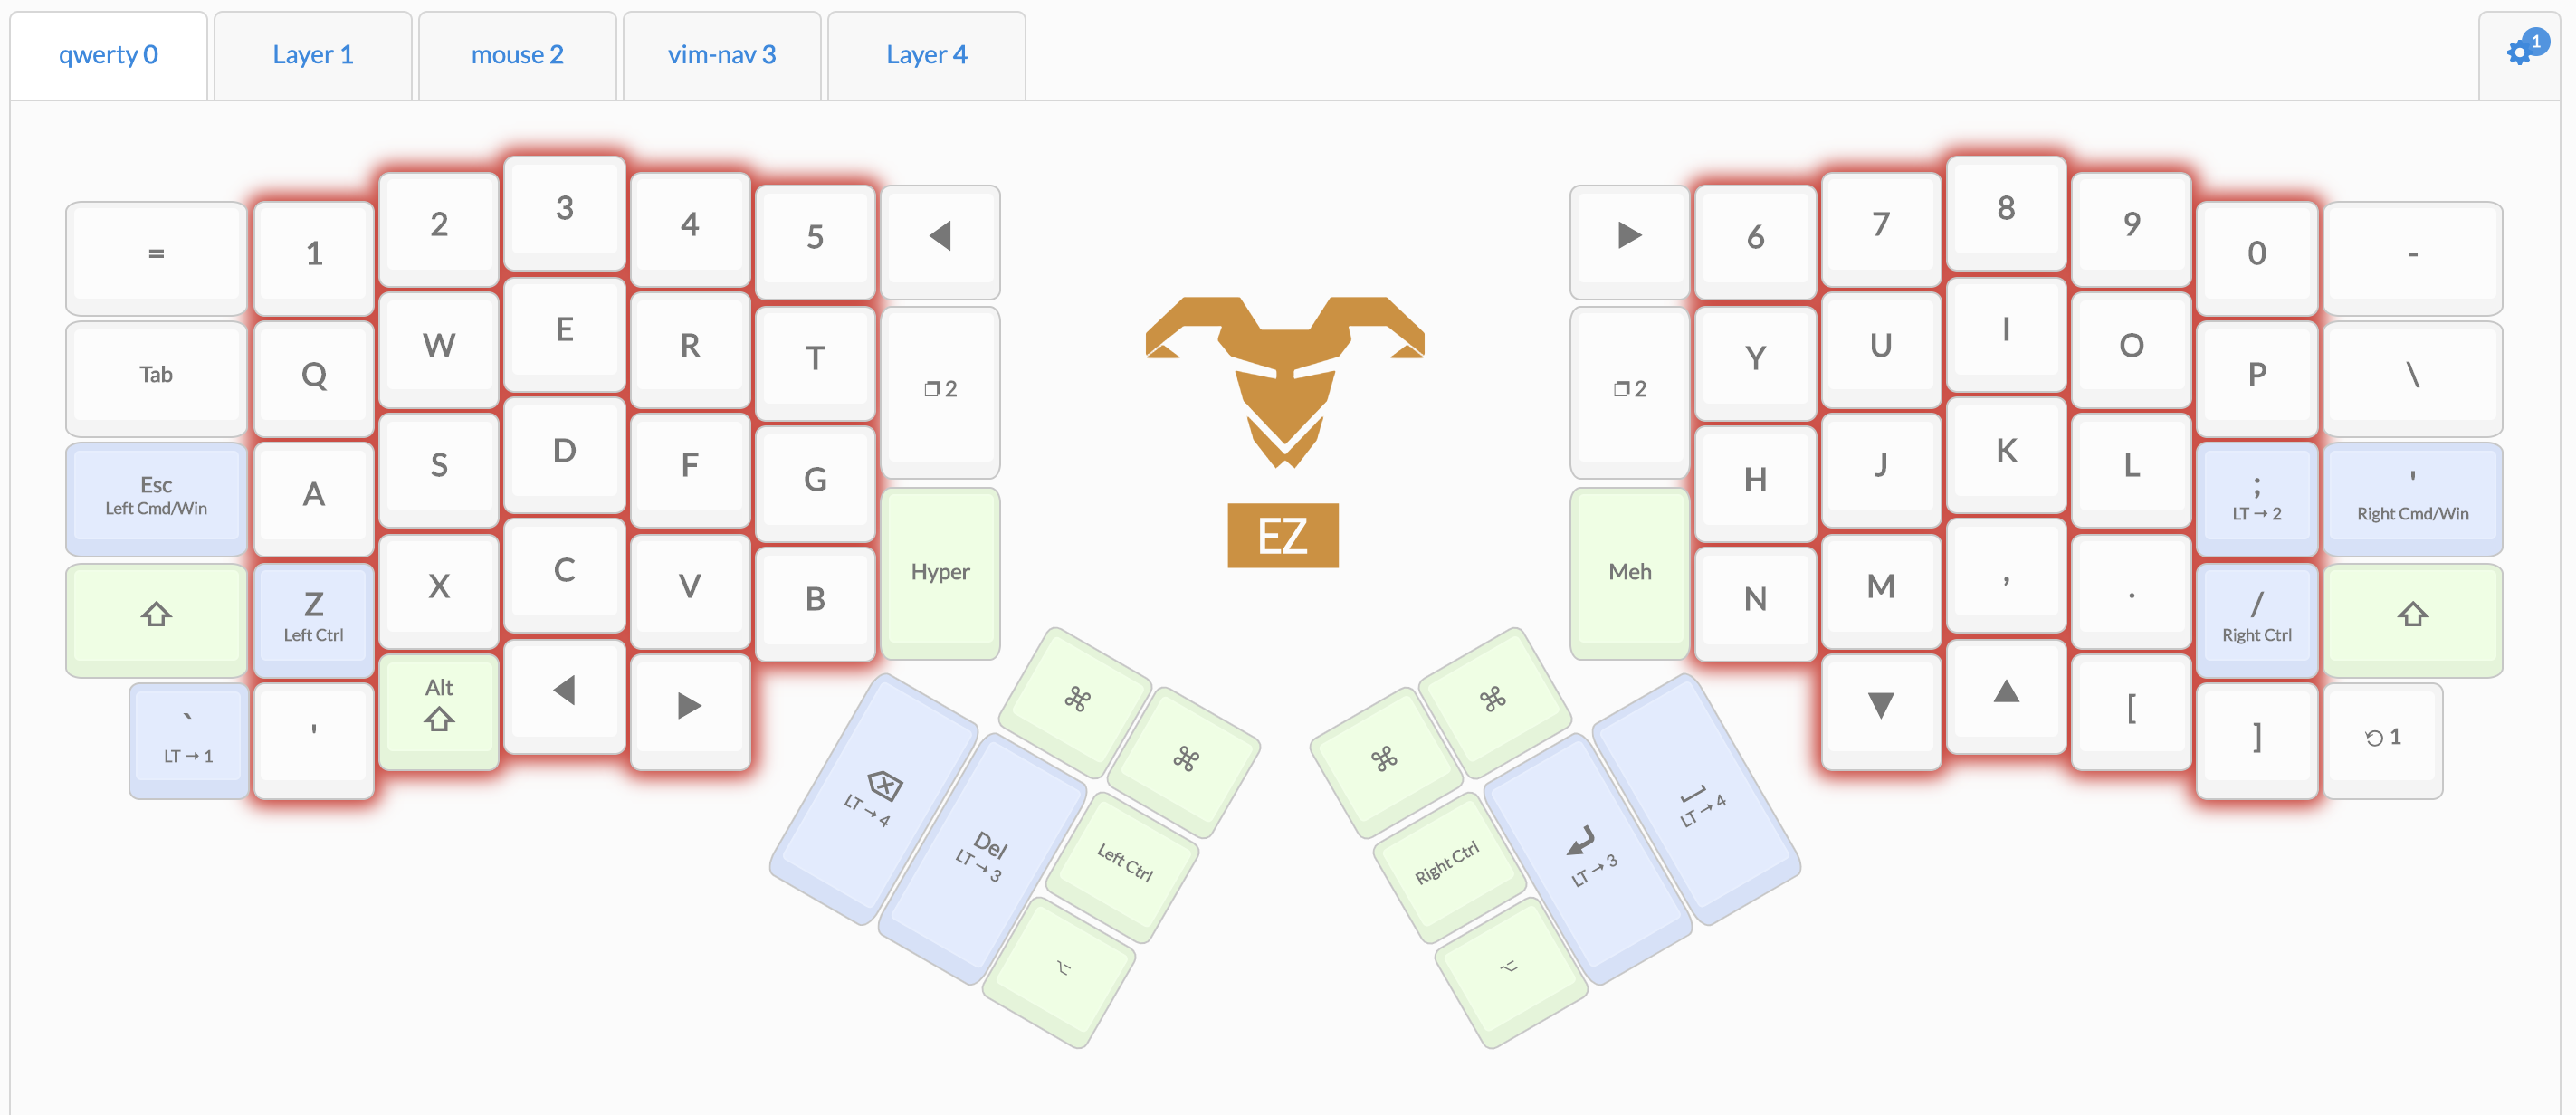
The main modifications are,
- mapping caps lock to escape (yes I use vim),
- making “z” and “/” map to ctrl when held,
- and generally moving modifer keys closer to the home row or the thumb clusters to reduce the strain on my delicate fingers.
The light blue keys act different when pressed or held. On the top they show the main key which activates when pressed and beneath it they show the key which activates when held. I love this feature, it really allows you to get creative.
My next layer is a numbers and symbols layer.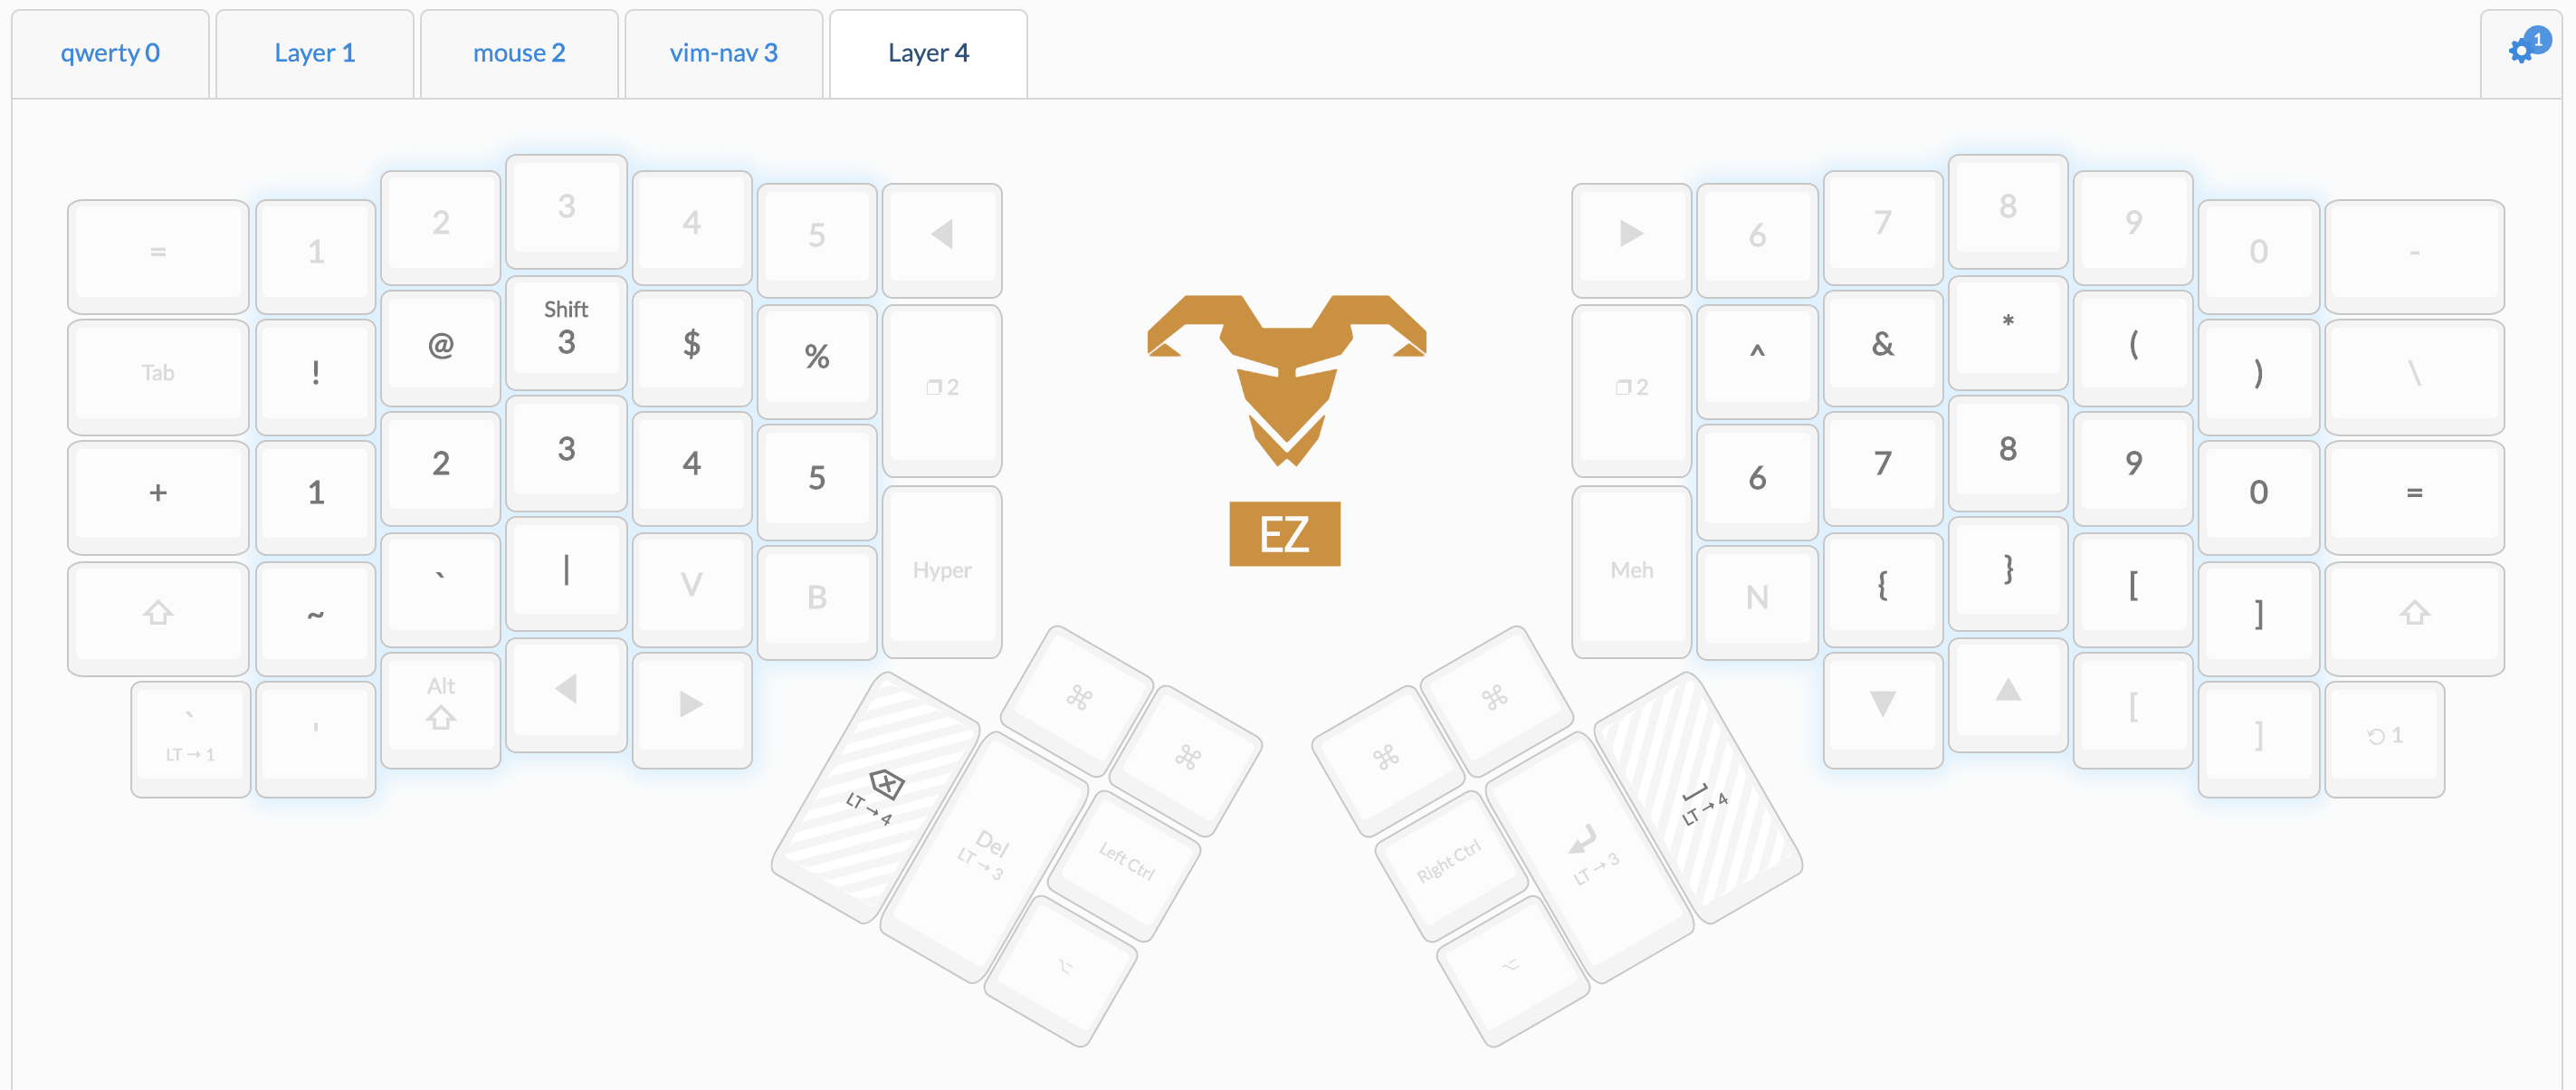
And finally, my vim inspired OSX shortcuts layer.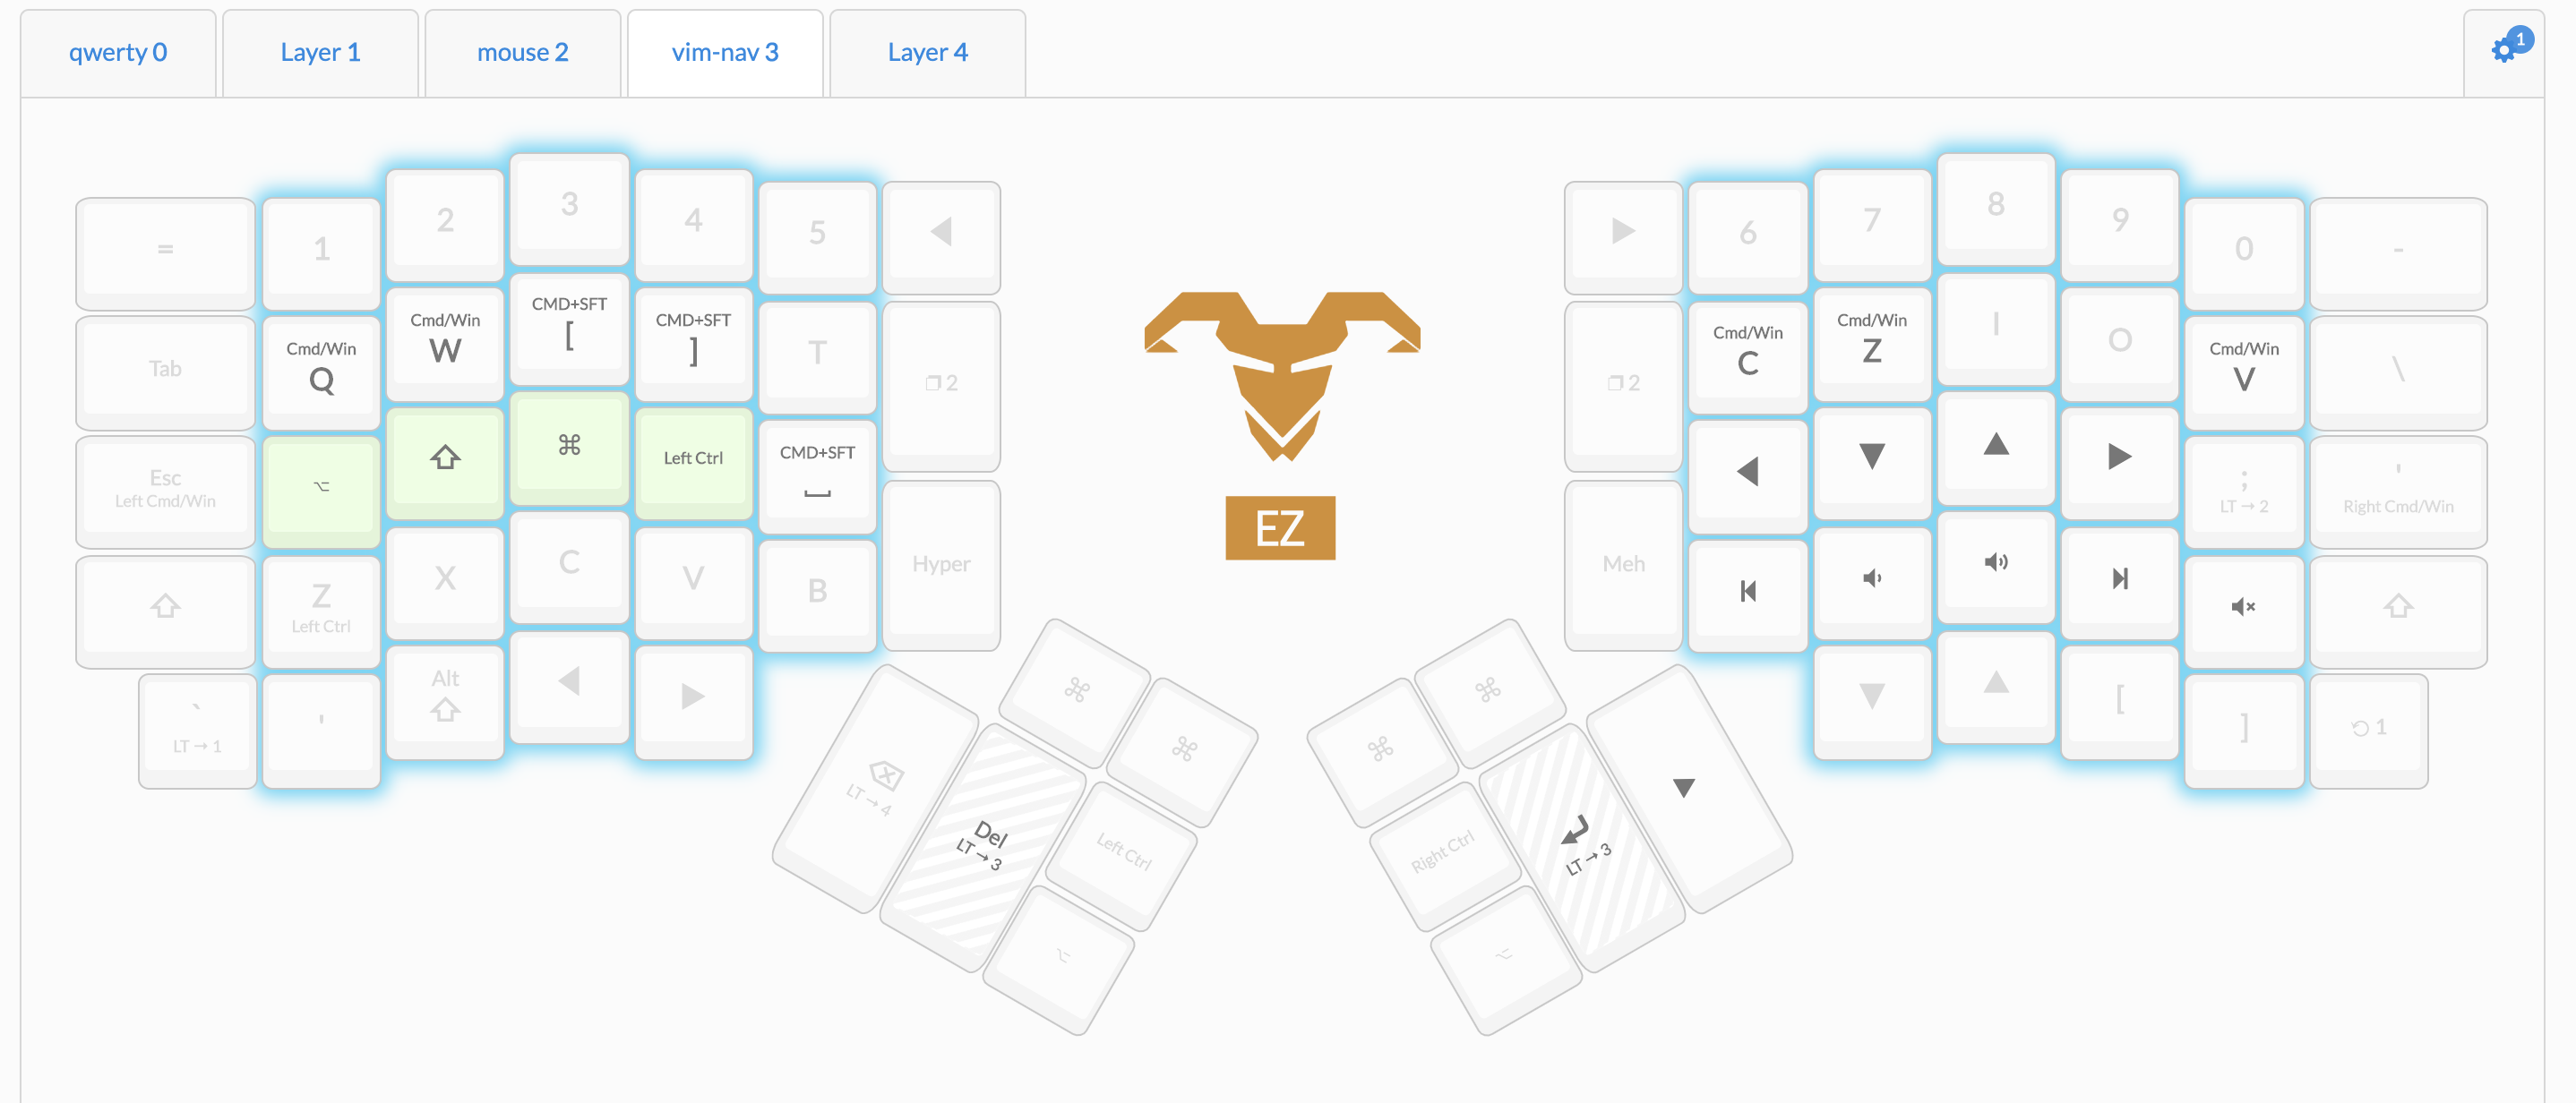
In OSX switching tabs in applications is achieved with CMD+SFT+[ and CMD+SFT+] so I have mapped these to “e” and “r” in this layer. Although I use vimium for browsing the web (where I can use SFT+j and SFT+k to change tabs) these keybindings in this layer have been super useful for other applications. In OSX CMD+q is used to quit an application and CMD+w is used to close the current window so I have mapped these to “q” and “w” in this layer.
To Summarize
I have given the ErgoDox EZ a lot of hype but it is not without its negatives. I must admit I don’t like the wrist wrests that come with the ErgoDox as they are not high enough and promote poor posture. I never use them now and instead position my hands so that my wrists are not bent and my forearms are parallel to my desk. I also miss the concave keywells on the Kinesis Advantage and the accompanying reduced finger strain. The concave keywells significantly reduce the amount of finger movement required to hit keys a few rows from the home row.
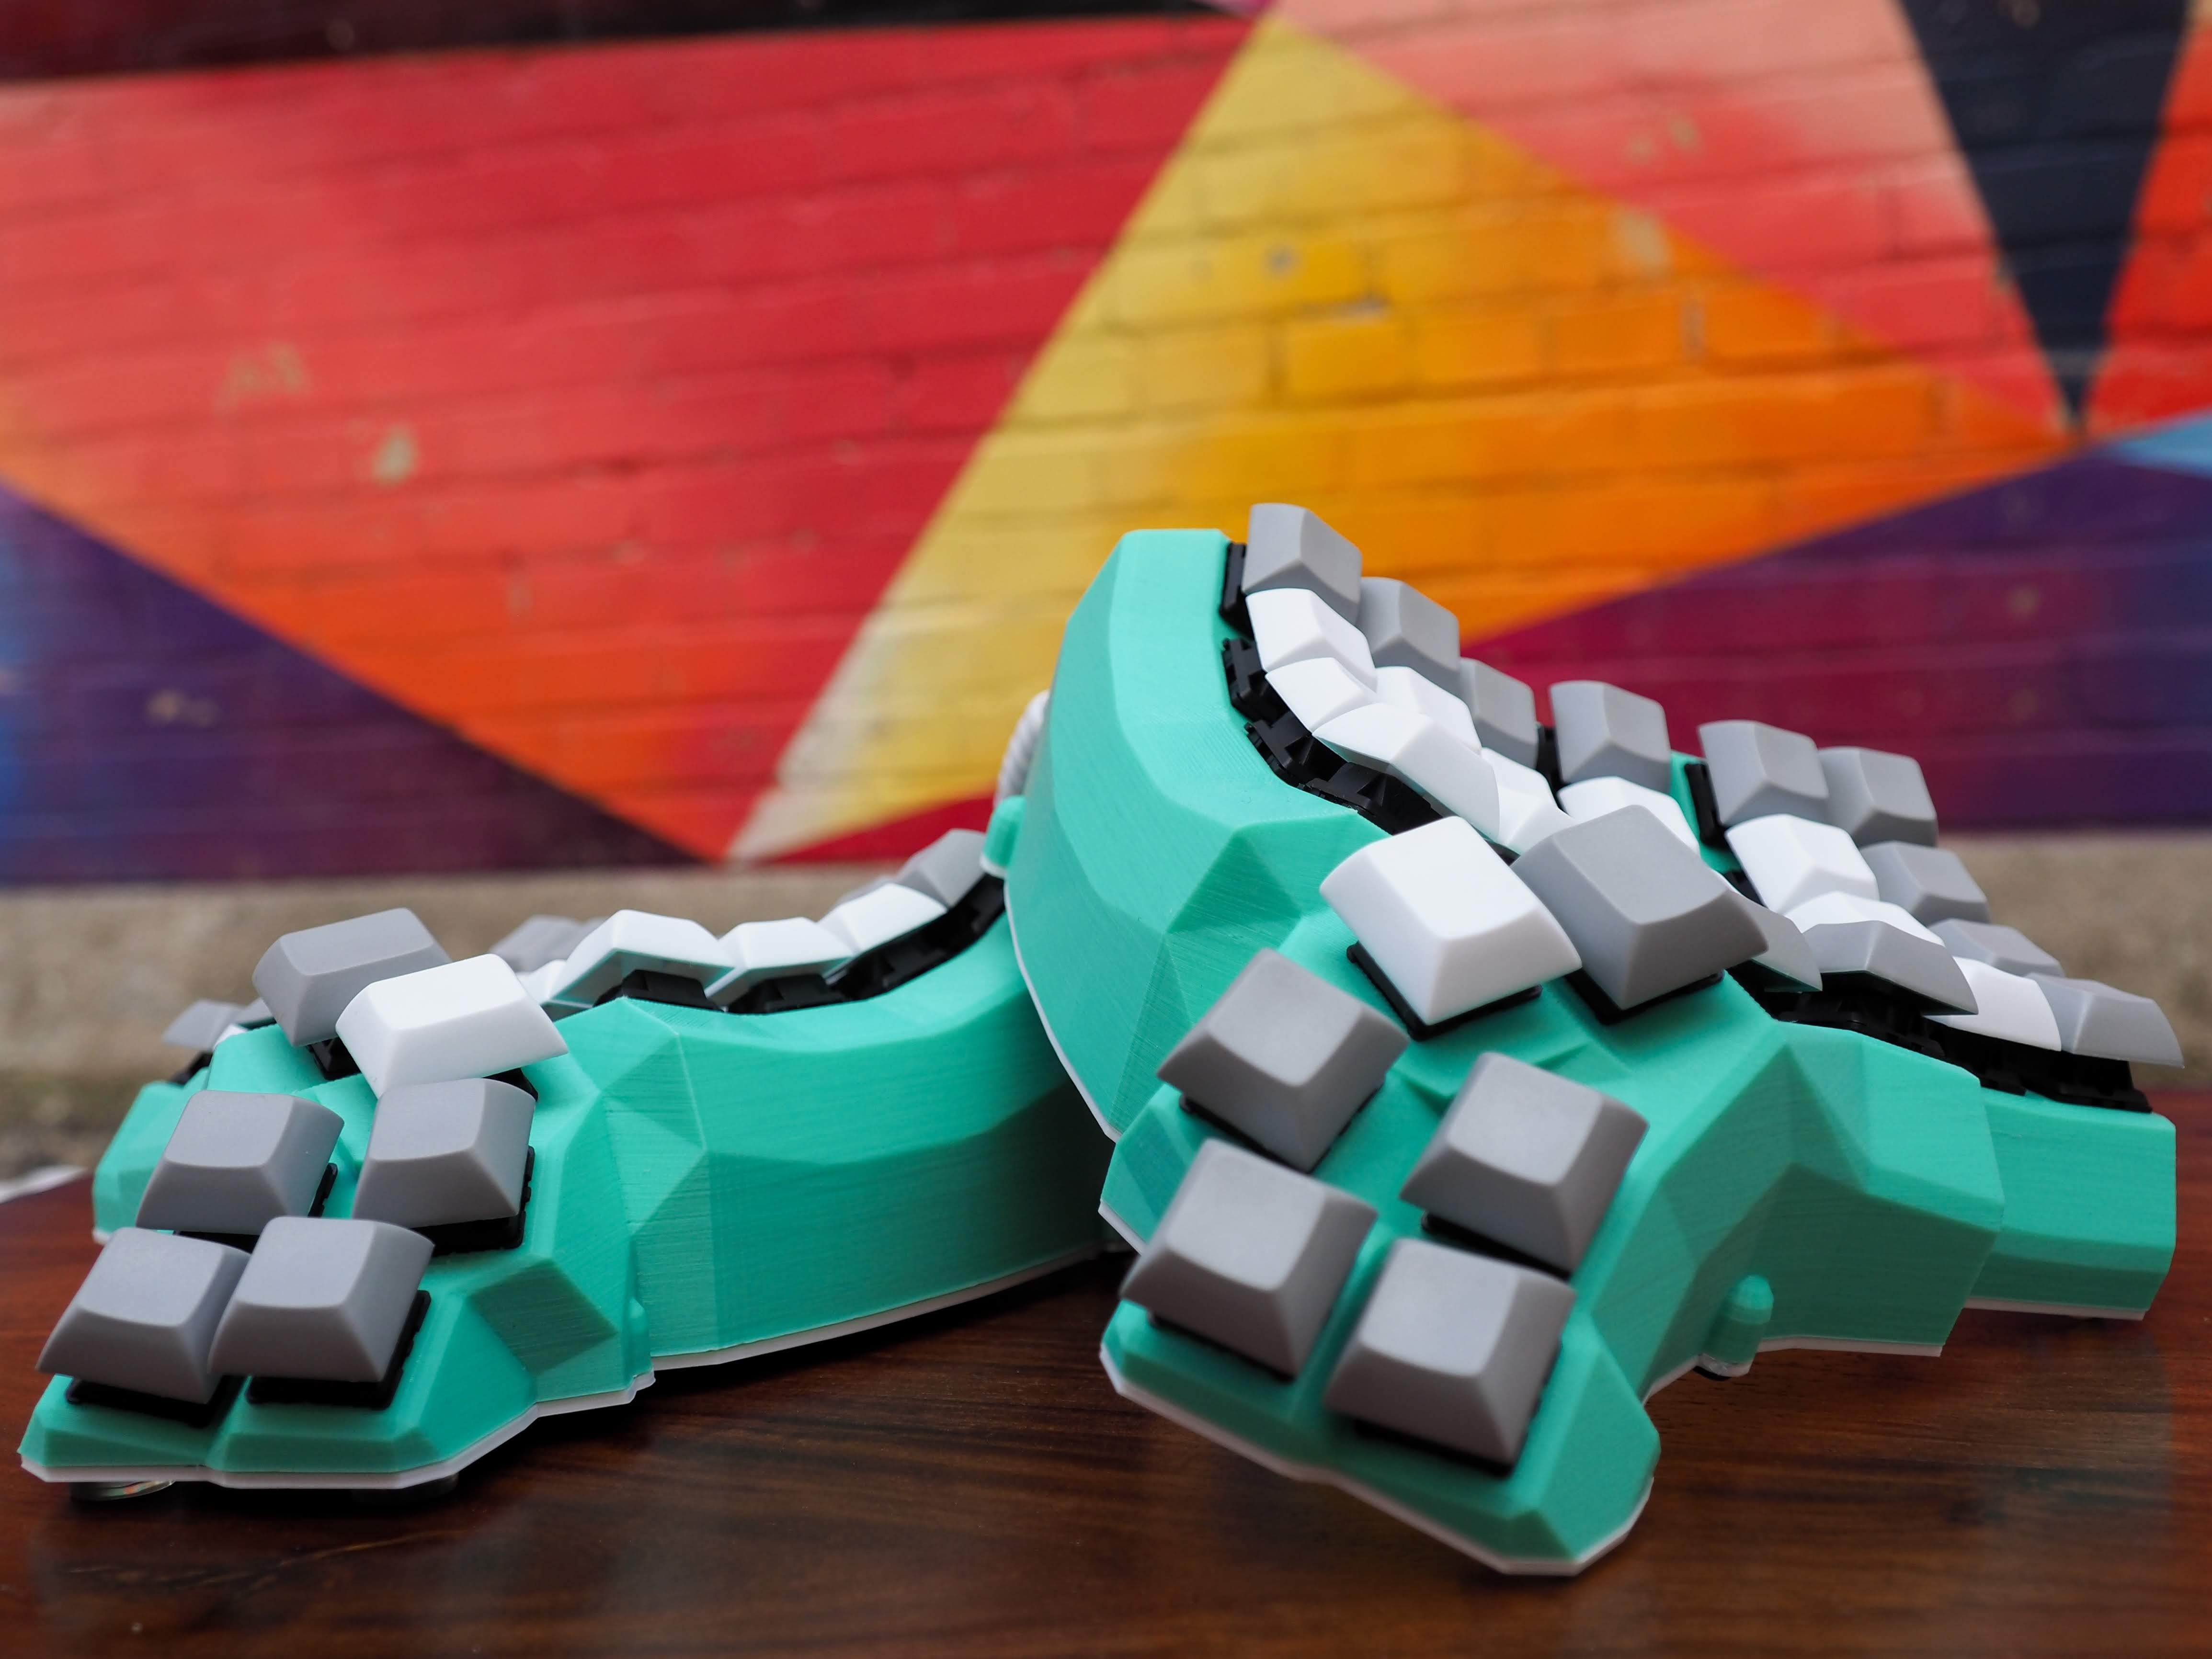
Overall I am super happy with the ErgoDox EZ, not only is it super ergonomic but it’s also absolutely beautiful. That doesn’t mean I haven’t got my eyes on a new keyboard for the future though! I have been really drawn to the Dactyl Manuform open-source keyboard. It’s similar to the ErgoDox EZ except it also has concave keywells. The big barrier to getting a Dactyl Manuform is the fact that you need to 3D print the case, solder the PCB and assemble everything yourself. You do get complete artistic freedom though and they can look beautiful, check this one out from here.
Here’s a little table to summarize the main differences between the keyboards. Hopefully it will help you with your ergo keyboard journey!
| Keyboard | Ortholinear | Concave Keywells | Split | Tenting | Layers |
|---|---|---|---|---|---|
| Microsoft Natural Ergonomic | No | No | No | Yes | No |
| Kinesis Advantage 2 | Yes | Yes | No | No | No |
| ErgoDox EZ | Yes | No | Yes | Yes | Yes |
| Dactyl Manuform | Yes | Yes | Yes | Yes | Yes |
Switches
One question that I could never find an answer to when I was first exposed to the world of mechanical keyboards (/r/MechanicalKeyboards) was, what are the best switches for an RSI sufferer?
The lightest you can go without mistyping or hammering down the keys. Lighter springs put less strain on your fingers since it takes less force to press down, but if you hammer keys down, the impact with every keypress might do more damage.
I have Cherry MX Silent Red on my Kinesis Advantage and I do find that I bottom these out a lot. After a lot of research online and playing with a switch tester, I decided to buy the Kailh Speed Copper switces for my ErgoDox EZ.
I have found with the Kailh Speed Copper I can expend mimimum effort whilst avoiding bottoming out 99% of the time. I also make fewer mistakes and really like the feel of the tactile switches. This is definitely a personal preference though and everyone should try out different switches and find what works best for them.
Even better than a switch tester is actully typing on a physical keyboard with the switches installed. This is because it tests wether or not you would actually bottom out the switches whilst typing. If you have a local mechanical keyboard shop go along and test some of the switches and see if you bottom them out whilst typing. If this isn’t an option then I ordered this switch tester from banggood.com because it had the majority of the switches that I wanted to try out. Ali Express also has a good selection.
Who Needs a Mouse…
In my quest to become an ergonomics master I couldn’t resist the urge to go full power user and stop using a mouse. I do actually have a Posture Penguin Verical Mouse which I would recommend for the times when you do actually need to use a mouse. The vertical nature prevents your arm from twisting and putting unnecessary strain on your elbow and arm.
Obviosuly the main step towards removing your mouse from your life is learning all of your OS keyboard shortcuts. In order to make the transition easier here are some of the best apps for OSX (imo).
| App | Description |
|---|---|
| Alfred | Productivity app for OSX; spotlight on steroids (trun bluetooth on/off, connect/disconnect bluetooth devices, kill apps, control spotify and much more). |
| Amethyst | Tiling window manager for OSX. |
| Hammerspoon (spacehammer config) | Tool for automation in OSX. I use the spacehammer inspired config and I would highly recommend checking it out if you use spacemacs or vim. |
| MailMate | Replacement email client with extensive keyboard control. |
| Rectangle | Move and resize windows in OSX with keyboard shortcuts. |
| Shortcat | Click buttons and control apps without leaving your keyboard. It’s similar to Vimium but for OSX. |
| Time Out | Setup break reminders and use the breaks to stretch. |
| Vimium (for chrome/firefox) | Provides keyboard shorcuts for navigation and control in the spirit of Vim. |
Stretching and Strengthening
I was given 8 exercises by my physio and they defintely played a massive role in my recovery. Initially I kept forgetting to do the exercises but ever since I installed Time Out I’ve been knocking them out 3-5 times a day.
The best exercises that I’ve noticed alleviate the most pain are wrist extensions against a wall and wrist extensors the other way.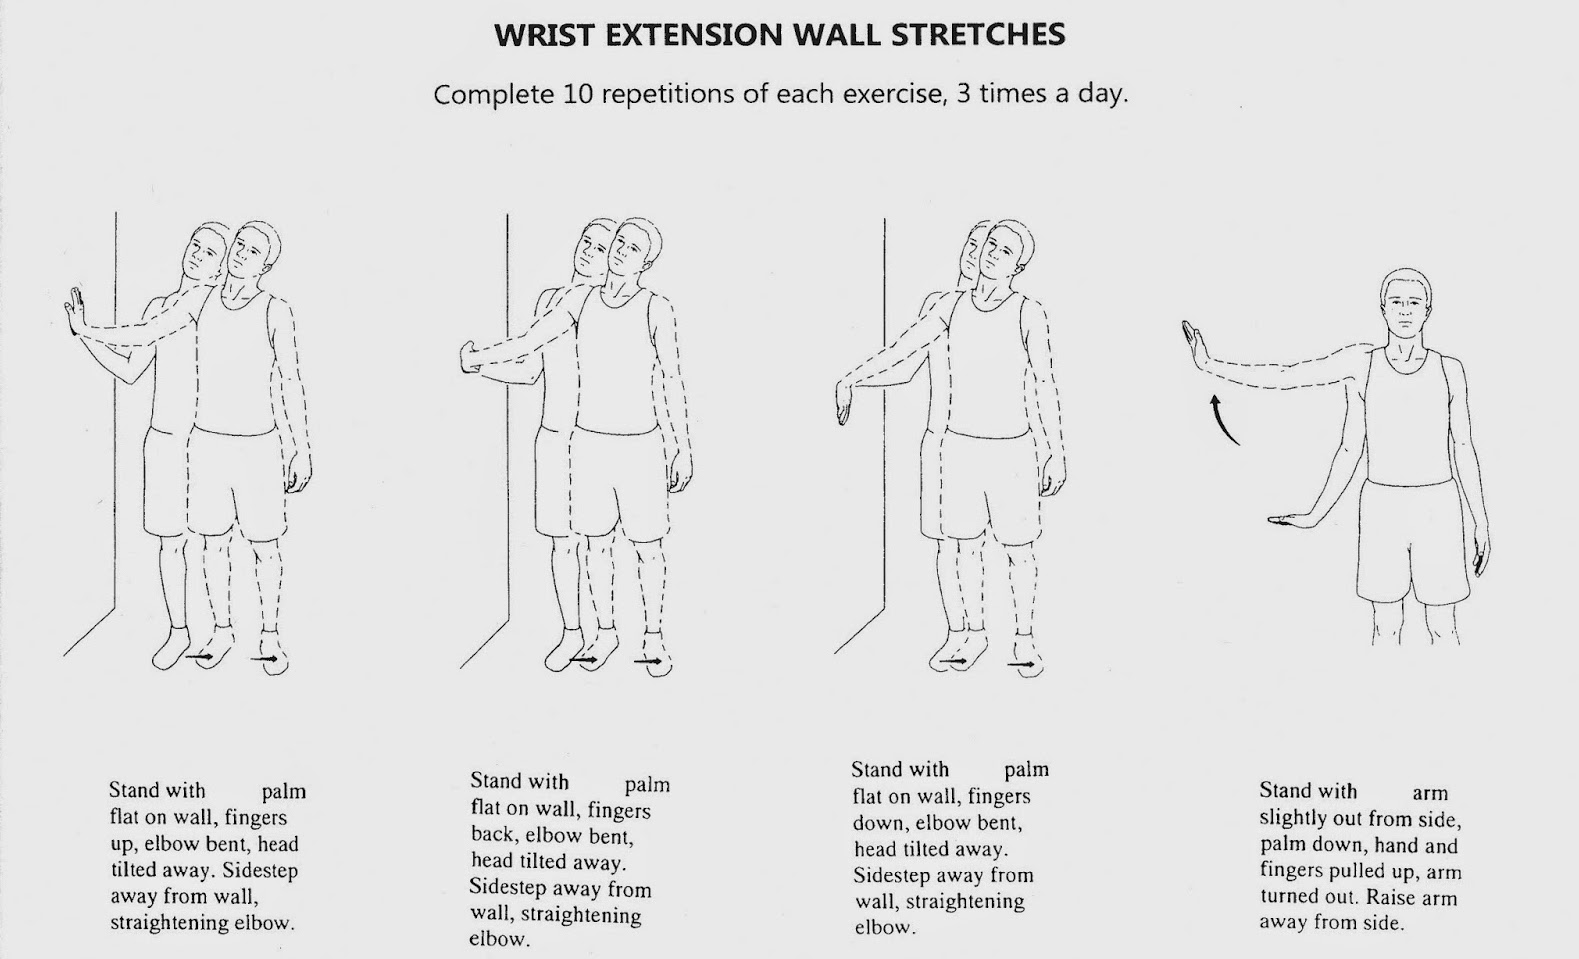
Image from [HB Hands](http://www.handshb.com/2014/07/wrist-extension-wall-stretches.html)
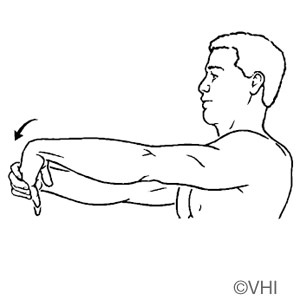
Image from [Therapeutic Associates](https://www.therapeuticassociates.com/athletic-performance/running/stretching-for-runners/wrist-extensor/)
I would highly recommend checking out these exercises if you haven’t already!
One massive mistake that I made when I first developed RSI was stopping climbing and exercising my wrists. For some reason I was under the impression that anything activating my fingers/wrists would make the pain worse. This is not the case, in fact quite the opposite. Exercises that strengthen your wrists are actually super good for your recovery so you should continue going to the gym/climbing and especially work on your grip strength (deadlifts etc).
Text Editors and IDEs
I have been programming for over 5 years now so I’ve had a fairly long relationship with text editors and IDEs. Back in the day whilst I was starting out I used Xcode. I don’t have much to say about Xcode other than I moved on quickly… Sublime text was next and it served me well, however, for some projects I couldn’t help but want a bit more from my coding environment. This inevitably led me to checking out IDEs.
I first discovered PyCharm and then the rest of JetBrains IDEs. I fell in love, what a great set of IDEs. In particular, I loved the debugging capabilities in PyCharm and the fact that anything I learnt in PyCharm (for python coding) I could transfer to IntelliJ (for Java coding) or any of their other IDEs. I was also using WebStorm for all my web related endeavours at the time and they did all just work great! Whilst JetBrains IDEs were superb, I always felt that I wanted a more minimalistic text editor; something that I could configure to my exact needs. This led me to Atom. Although I enjoyed programming in Atom, I never truly fell in love as I always had sublime text in the back of my mind (I think it was that sweet start up time).
In the end I was back rocking good old sublime text.
Although it worked well at the time, it didn’t do too much regarding ergonomics or productivity. In particular, it didn’t satisfy my new found love of keyboard shortcuts and my desire to never use a mouse.
As I’ve mentioned already, after developing RSI I started to learn the Vim keybindings. The keybindings are not limited to just the Vim editor, I use them for navigating my browser, I use them inside jupyter notebooks and I now use them inside Emacs. What’s Emacs?? Emacs is a family of text editors known for their extensibility. I use Emacs for all my programming (python, web dev, version control), for writing LaTeX documents (which I use for both papers and presentations), for my email (I use Mu4e and offlineIMAP) and even for browsing the web and controlling spotify. Emacs is a truly wonderful piece of software and I would highly recommend checking it out. I actually have an even better recommendation for you to check out though; a community-driven Emacs config called spacemacs!
Spacemacs
The best thing to come from my journey with RSI is my new fully customised text editor. Spacemacs is a community driven Emacs distribution that argues (quite rightly imo) that the best editor is neither emacs nor vim, but a combination of both Emacs and Vim. It has been designed with three things in mind,
- Ergonomics,
- Mnemonics,
- Consistency,
which makes it great for an RSI sufferer. It uses a hierarchy of keymaps grouped by functionality with good mnemonic modifier-less keystroke sequences starting with the SPC key. Being modifier-less makes the typing experience significantly more ergonomic than other editors such as vanilla emacs.

Check out this amazing youtube playlist if you are curious about spacemacs or want to become a master. I’ve re-watched each video about 5 times in the hope to become as proficient as he is!
There is too much to say about spacemacs and it’s endless customisability. At some point in the future I will write a blog post and share my spacemacs configuration, but for now, I think this is enough. Hopefully I have inspired you to go and check it out!
Update
I use Spacemacs as my main IDE for any coding, writing, notes/planning/TODOs (orgmode), etc. I do not use it when I am at my command line! I have been using Vim as my command line editor as I prefer its speedy (almost instantaneous) start up time. After all, all that I want to do when I’m at my command line is make small changes to individual files.
In the comments of this blog @Phillip Kenoyer made me aware of SpaceVim . “SpaceVim is a distribution of the Vim editor that’s inspired by spacemacs.” Many of the main keybindings are the same as in Spacemacs and the start up time is negligible compared to my basic Vim config. I must say that I am very happy with my current setup, that is, using Spacemacs as my main IDE and SpaceVim when inside iTerm.
Looking Forward
RSI is scary because it feels like someday you could wake up and have to stop doing what you love. Even though I’m not cured, I do feel that these adjustments to my work station, workflow and life have more or less saved my career, or at least greatly extended it. I hope the info in this post is helpful to someone and please do reach out if you have any questions or want some advice.
I really wish I knew all of this years ago so that I could have been proactive in preventing RSI as opposed to reacting in a hope to manage/cure my RSI. My advice to anyone reading this is to kick start your ergo journey regardless of whether you have developed RSI or not.
On a more exciting note, here are some things I am currently exploring and thinking of including in my setup/workflow,
- Linux i3 window manager (i3wm) - I’ve wanted a personal Linux setup for a while now and I’m currently experimenting with a Manjaro i3 install. Manjaro i3 is a lightweight tiling window manager, famous for its efficiency with screen space and keyboard controlled workflow.
- Emacs X Window Manager (EXWM) - I am also considering switching out i3 for EXWM so that I can use my Spacemacs shortcuts everywhere. You can never have too much Emacs!
- Vanilla Emacs - As much as I love Spacemacs, it does have more bloat than I would like so I’m considering a fresh Emacs install and building a configuration similar to spacemacs.
- Key Logger - I am curious about what keys I use the most and how I could use this info to make my keyboard layout more ergonomic.
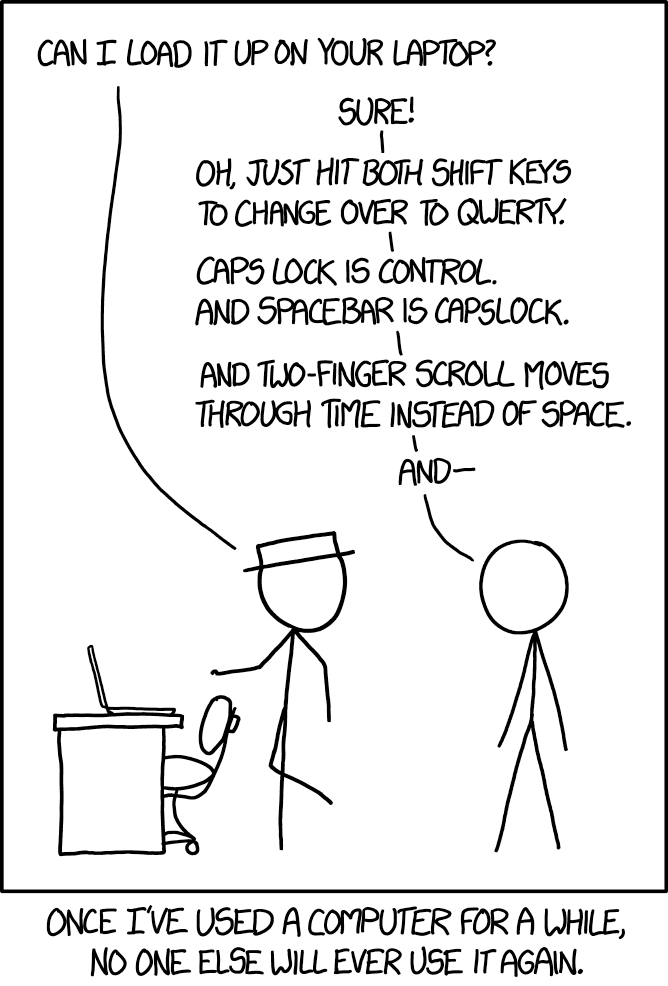
Image from [xkcd](https://xkcd.com/1806/)
Edits/Updates
- I have just been made aware that you can use the TMK/QMK firmware with most keyboards using the hasu usb-to-usb converter. Meaning most keyboards can have layers similar to those I showed for the ErgoDpx EZ.
- I posted a link to this post on reddit and there are some useful comments which you should check out!
- I’ve had quite a lot of feedback regarding alternative keyboard layouts (Dvorak, Colemak, Workman, Maltron etc). I should make it clear though that I haven’t personally exeprimented with any layouts (except QWERTY) at the time of writing. Here’s some nice info copied from /u/zardvark’s comment on reddit.
While there are likely dozens of possible layouts these days, all vying for your attention, Dvorak, Colemak and Workman are now supported by many of the popular touch typing training programs and web sites. Most importantly, these alternate keymaps reduce a lot of the reaching, stretching and wasted motion, which is inherent with the QWERTY keymap. The efficiency gained translates to reduced wear and tear on your hands (AKA: less pain and fatigue), fewer typing mistakes and in time, a likely boost in productivity. If you really want to nerd out about keyboard layouts, this is a fun read: http://mkweb.bcgsc.ca/carpalx/. If not, just be aware that virtually anything is better than QWERTY and Colemak has a strong and growing following. If you are into ortho/columnar boards, Workman was designed specifically with these boards in mind: https://workmanlayout.org/. I don’t have anything bad to say about Dvorak. It’s a huge improvement over QWERTY and a lot of users swear by it, but there just doesn’t seem to be as much excitement behind it as is being enjoyed by Colemak. If you already know/use Dvorak, don’t worry, be happy. You are already doing your hands a great favor! : )